Last Updated on August 1, 2019 by Kevin B Agar
I think I’ve lost count of the number of times I’ve heard someone say they haven’t done any post processing because they don’t know how to.
The usual comment is ‘I have a copy of Photoshop (insert version here) but when I open it the interface is very busy and I don’t know where to start’
Taking this into account, I thought I would try to go over my workflow for Bird Photography, but explaining each part of the process and the alternatives that are available.
To do this I’ll use one image and explain what to do and the workflow that I use. I’ll be ignoring loads of the options in photoshop as I don’t think they are important at the start and will only confuse. The main reason for writing this is to show that it really isn’t that daunting if you take each tool and learn about that before moving on. With this in mind I will start with cropping. Why crop I hear you say, shouldn’t you compose in camera? Maybe in an ideal world but with bird photography it’s very rare to get the opportunity to fill the frame with a bird and in exactly the right place within the image. Also this is written for Windows users as I don’t own a mac, but I’m sure it’s the same except for the keyboard shortcuts.
Cropping is the term used for selecting a section of the image to improve composition and increase the amount of the image taken up by the subject and also to change the aspect ratio of the image.The aspect ratio is the ratio of the long side to the short side, for example 6X4, 7X5 etc.
So starting with the image from the camera
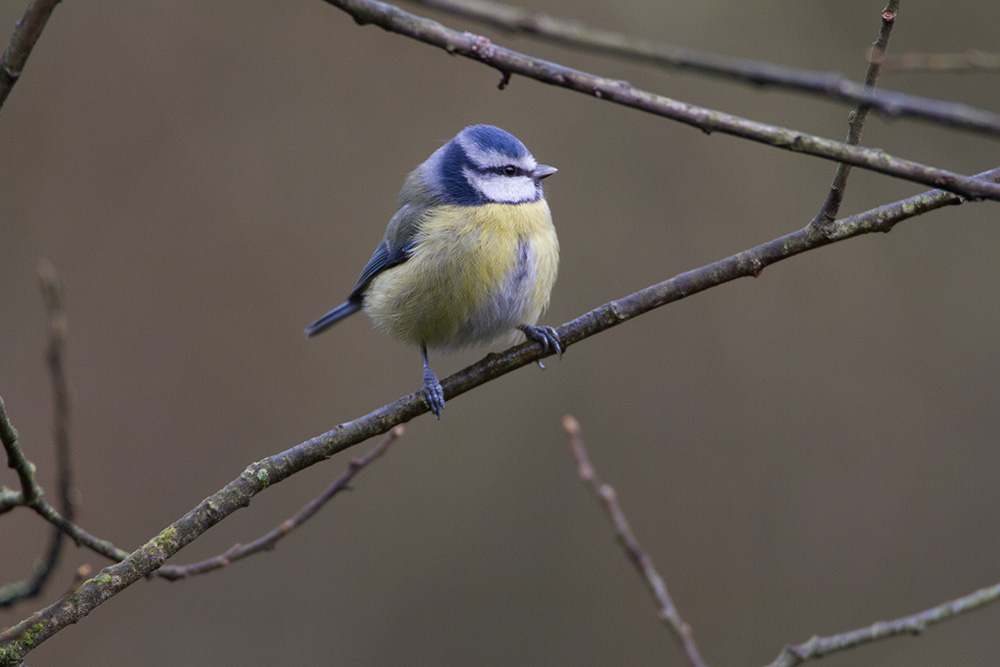
Blue Tit Canon EOS 7D f/5.6 1/250sec ISO-800 700mm
We want to increase the size of the bird, move it in the frame and alter the aspect ratio if required. A note here, I personally don’t like changing the aspect ratio of my images, so as they come out of my camera as 3X2 then this is where I leave them.
Depending on which version of Photoshop you have the Tools will be arranged differently, but they are basically the same. In Photoshop CC 2014 they are on the left of the main window as shown below

The crop tool is the 4th down and looks like
![]()
and when you right click on the little arrow at the bottom right of the icon you get further options,
like so

Select the crop tool and you should get an image like this

At the top of the workspace you will find options for the crop tool

From left to right
1st is tool presets and for the moment can be ignored
2nd is the aspect ratio but predefined values such as 7X5, 6X4, original size etc
3rd is also the aspect ratio, if left blank then you can crop to any shape or aspect ratio you want and the two arrows between the boxes are to reverse the selected aspect ratio, such as 7X5 becomes 5X7
The only other thing of importance to us is the overlay button
![]()
This allows us to overlay the cropping with a grid to assist with the composition. Right clicking the little arrow at the bottom right of the icon will give the following

Moving the cursor to the corner of the image will cause the cursor will change to
![]()
Or if you go to the side of the crop box then to
![]()
When the cursor changes to one of the above, left click and drag the crop box to the required place and size.

If you have the correct size but the bird in the wrong place, move into the crop box, left click and move the image about in the crop box to the required position. When you’re happy with your results just hit the Enter/Return key to commit the changes.
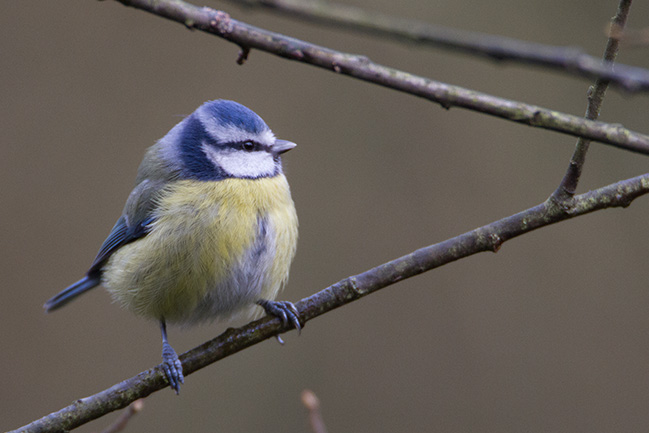
Blue Tit Canon EOS 7D f/5.6 1/250sec ISO-800 700mm
A couple of other things to mention
If you move the cursor to the corner and then move a little bit further out of the image the cursor changes to an arc with an arrow at each end
![]()
If you left click on this and move the cursor it will rotate the image.
If you want to go back and undo something then just use Ctrl Z which will undo the last command. If you want to undo even further then use Ctrl Alt Z and that will undo every time you use it.
I hope this is of some use to somebody and if favourably received I will do Levels and Curves next.