Last Updated on August 1, 2019 by Kevin B Agar
Recently I was asked if I knew of a decent tutorial on Masking. I had a quick look via google but didn’t come up with anything related to bird photography Post Processing (Actually I didn’t look very hard)
I decided that it would probably be easier if I tried to explain what I do in the hope that it would be helpful to him and maybe others as well. So here goes. Sorry but this is for Photoshop CC and Windows. I’m sure most of this can be done in PSCS6 and most of the commands are the same with Crapple.
After initial work with Lightroom for levels, cropping, colour etc I then open the file in Photoshop CC.
Rather than use Noise reduction on the whole image I prefer to mask the bird, do Noise reduction on the background, and then do noise reduction on the bird.
I use several different methods to select areas of interest depending on the subject and background.
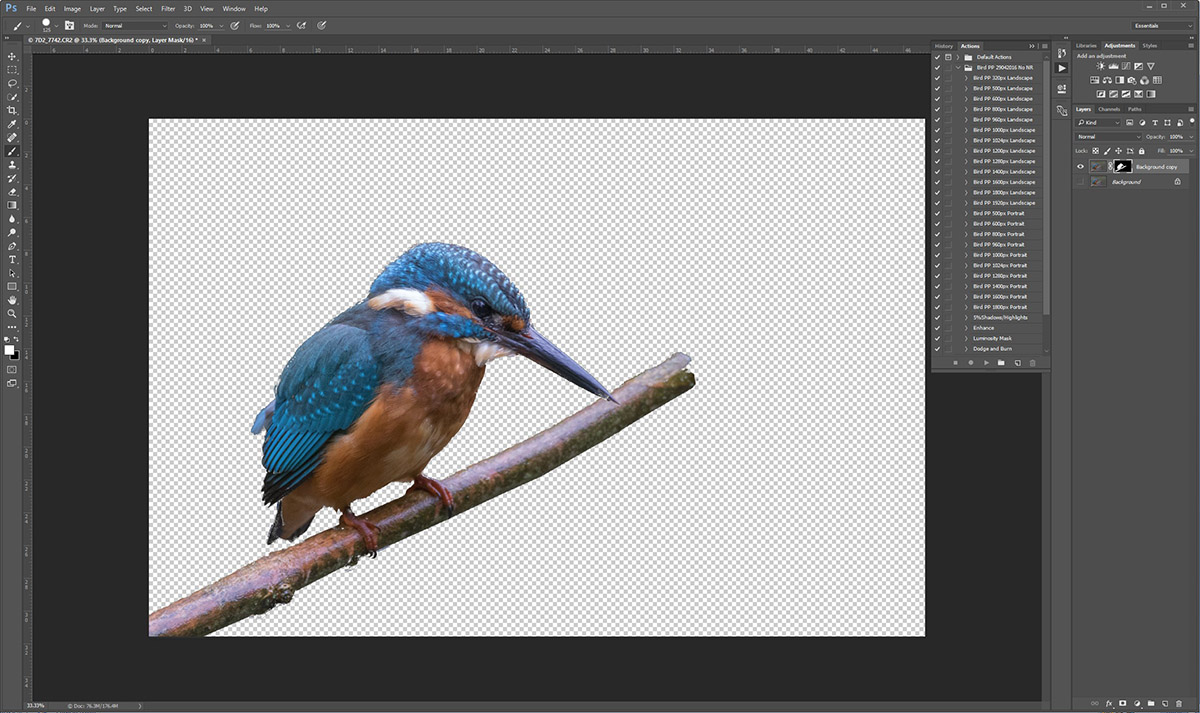
If the background is fairly uniform, and a different colour than the subject, as in this kingfisher image, then I would select the background using the command Select>Color Range
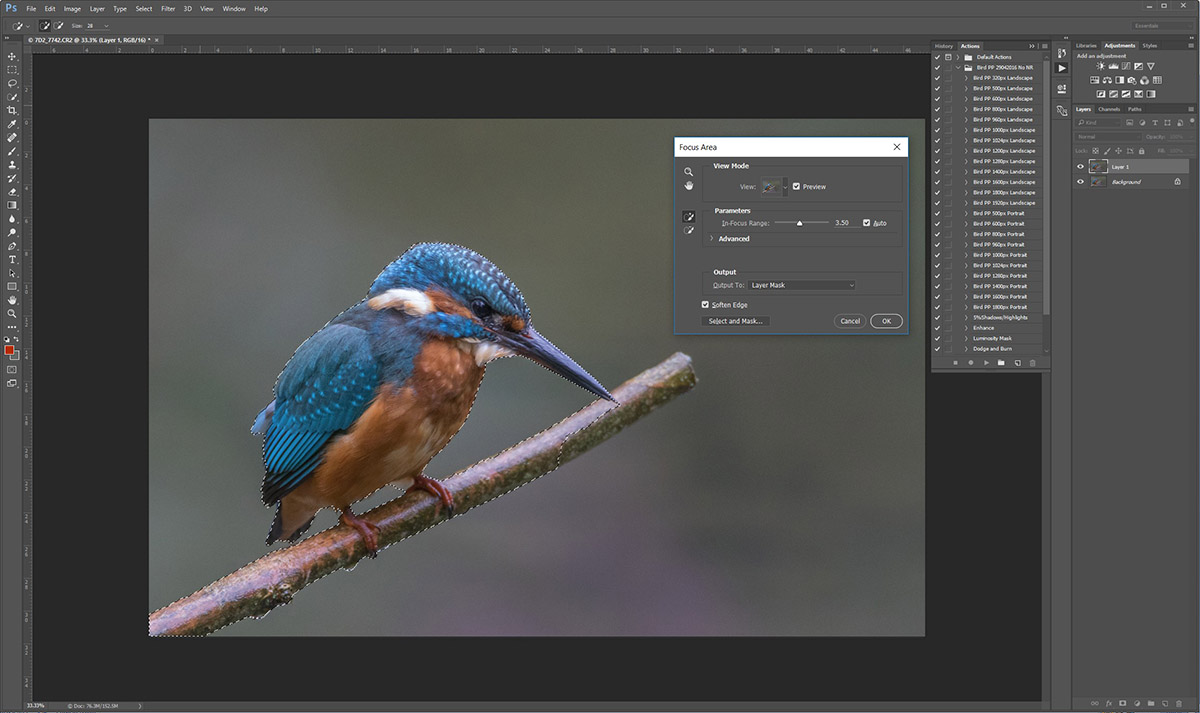
If the background is fairly uniform,and a similar colour to the subject, then I would select the background using the command Select>Focus Area and invert the selection.
If neither of these produced satisfactory result with minimum effort then I’d use the quick selection tool
So for this image using Select>Color Range
Duplicate the layer using Ctrl J or drag the layer down to the 2nd icon from the right at the bottom right hand side of the photoshop window
Select the top layer
Use the command Select>Color Range
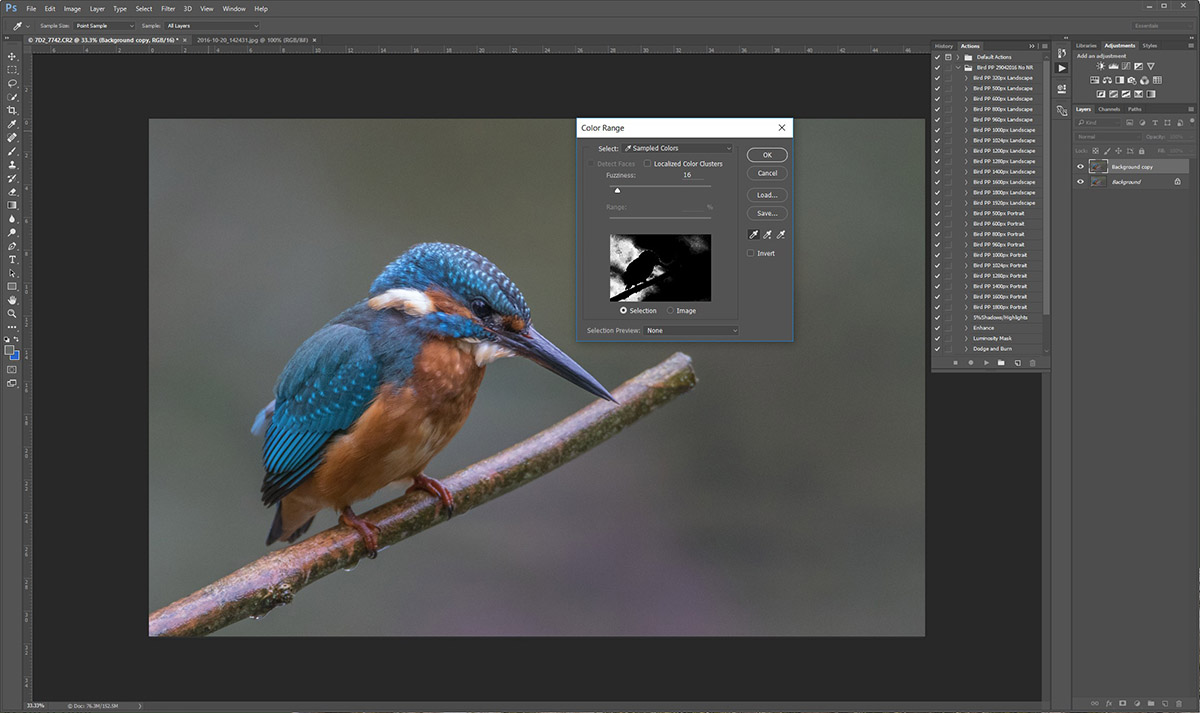
As can be seen, not all of the background has been selected. If you hold down the Shift key and click around on the background it will add to the selection. You can also use the Fuzziness slider which will change the range of pixels chosen. In other words if you chose a colour with a value of R100 G100 B100 and a Fuzziness of 10 then all colours from RGB 90 to RGB 110 will be chosen. If you use a Fuzziness of 20 then it will be RGB 80 to RGB 120. (these values are arbitrary and only chosen to explain the Fuzziness slider.)
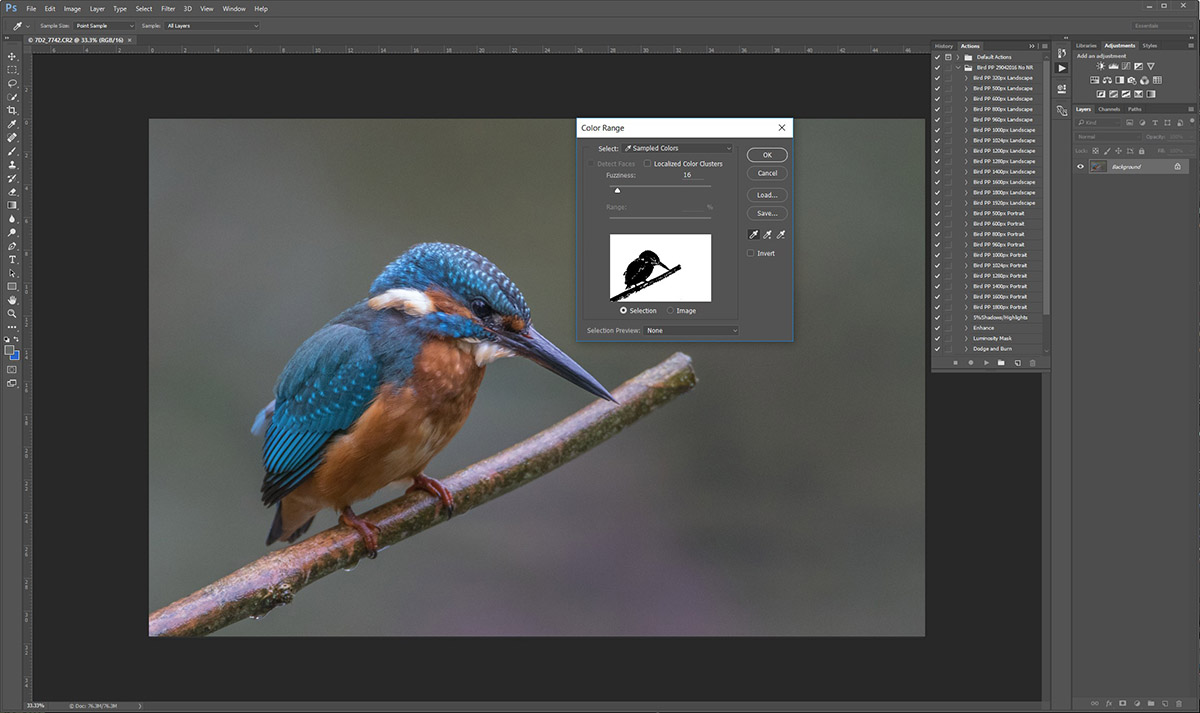
As can be seen, it’s not perfect and needs a little refining.

To refine you need to Edit in Quick Mask mode
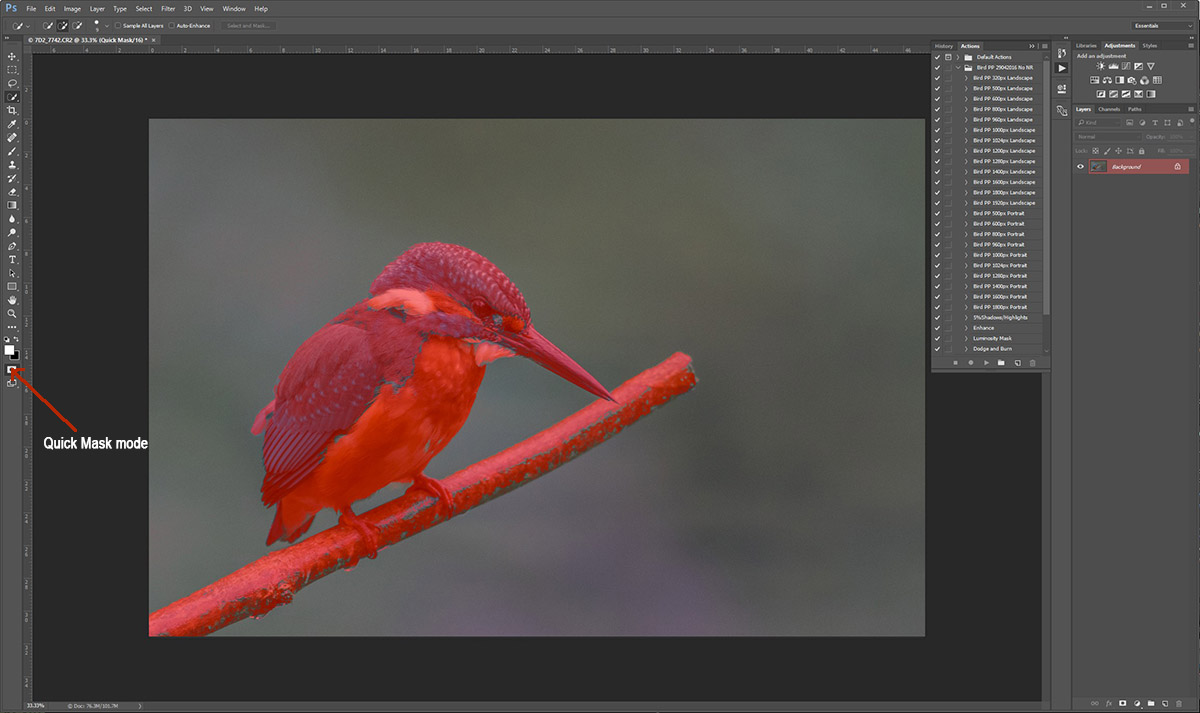
Using the paint brush tool with black or white you can refine the selection until it’s what you want.
Now select the add mask button, 5th icon from the right at the bottom right hand side of the photoshop window. This will add the mask to the selected layer.
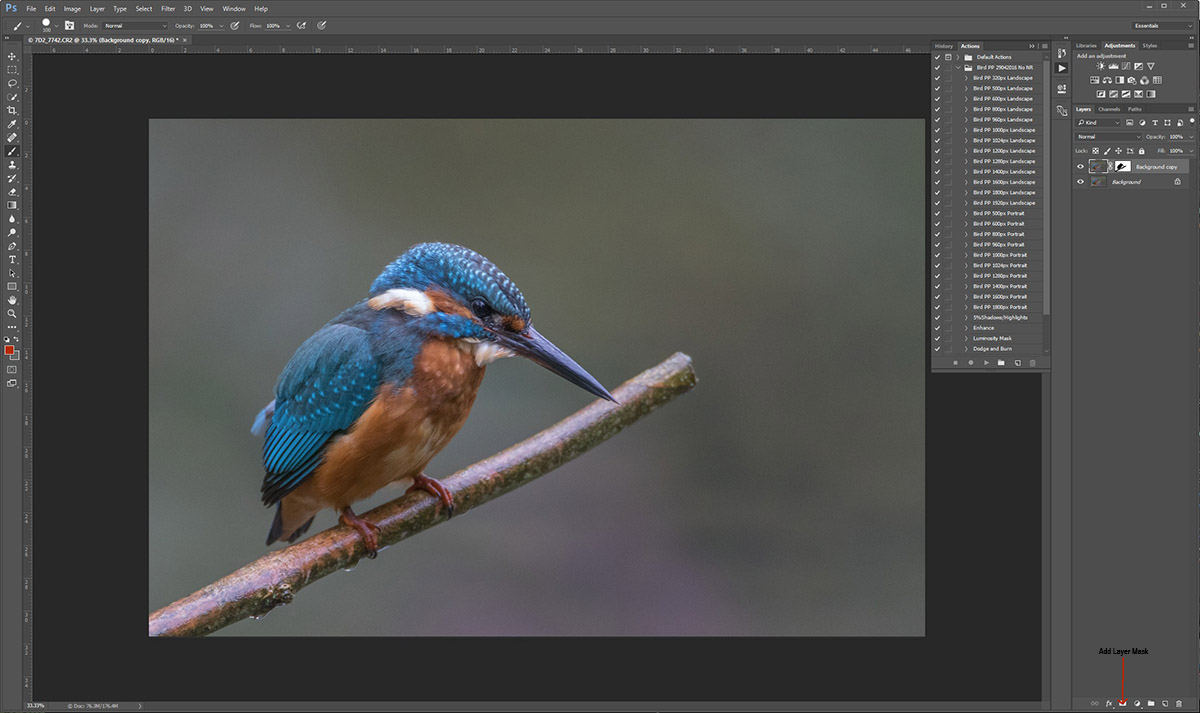
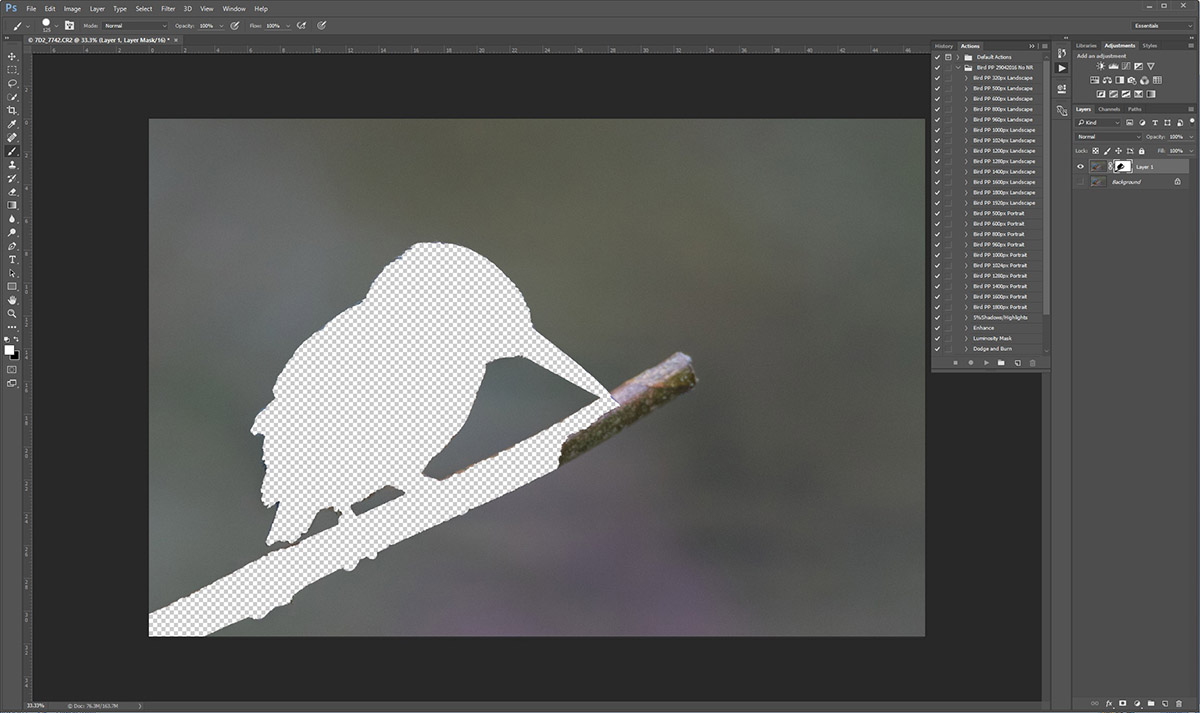
If you deselect the background layer you can see the effect of the mask.
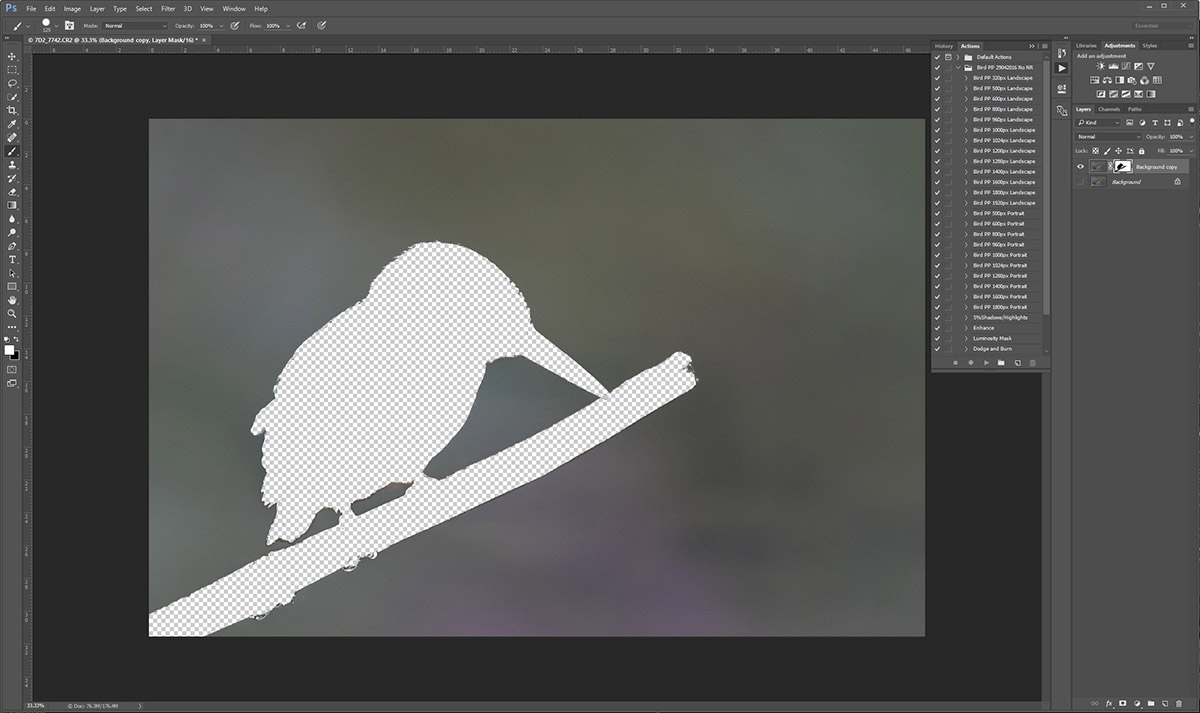
Now that you have a mask it’s still possible to change or modify it. If you select the mask you can paint with either black or white and modify it. If you make a mistake then reverse the colour and paint over the mistake (or use Ctrl Z)
If you click on the background layer (not the mask) you can perform whatever processing on the background of the image that you want and it will have no effect on the masked area, which in this tutorial is the bird.
If you want to invert your selection you can by selecting the mask and typing Ctrl I for Invert
Using Select>Focus Area
Duplicate the layer Ctrl J or drag the layer down to the 2nd icon from the right at the bottom right hand side of the photoshop window
Select the top layer
Use the command Select> Focus Area

Again, the selection isn’t exact, so you can add to it with the brush in the Focus Area tool or subtract with Alt and the brush in the Focus Area tool
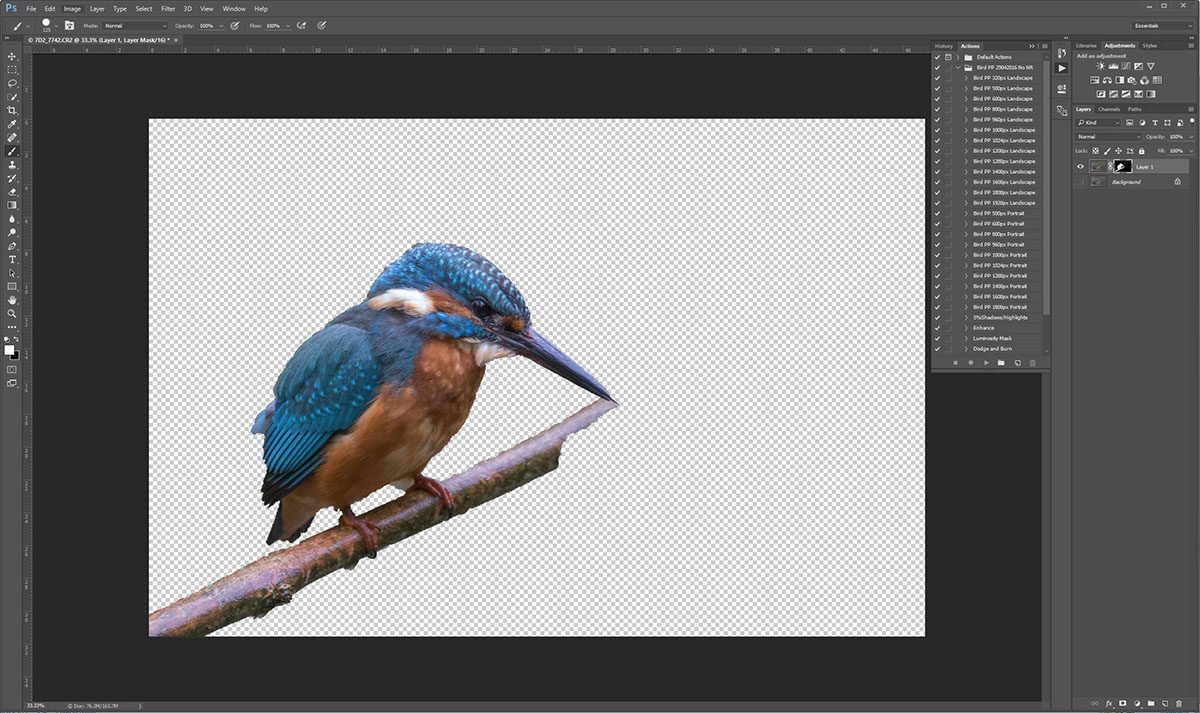
This has obviously selected the bird so you need to select the mask and Invert it with Ctrl I
Now that you have selected an area you can do your processing on that part only without effecting the masked parts. So if you want to sharpen the bird or remove noise in the background, it’s now possible.